This week’s Two Minute Tuesday examines the often overlooked ‘Routing Rules’ feature, which automatically places candidates and jobs on Rollup Lists based on their job titles.
If you have any comments or suggestions for something we can explain in about two minutes, send an email to twominutetuesday@mainsequence.net
We’re back with a fresh Two Minute Tuesday, Main Sequence’s series of short videos with tips, tricks, and tutorials to help make you a more powerful PCRecruiter user.
PCRecruiter has a number of handy little features tucked away here and there that users may be unaware of. In this video we’ll look at just such a feature: Routing Rules. In a nutshell, Routing Rules place Name and Position records on specified rollup lists based on their Title fields. This can be a useful organizational tool for grouping candidates and jobs automatically as they’re entered.
To configure this feature, we’ll start from the System menu and search for “Rules.” In this database we haven’t got any rules defined yet, and having never visited this screen before, we also don’t have any menu items pinned. We’ll start by pinning the ‘Add Rule’ item to the Action menu. Now we can add a rule.
For this demonstration, let’s say we want to start grouping C-Level candidates. We’ll keep ‘Name’ as the Rule Type, because this rule will be applied to Name records, but the same process we’re about to go through would be applied if we were routing Position records based on their Job Titles.
First we’ll name this Rule. Now we start adding titles. When we click ‘Add’ the system will display the Titles table, if we’ve got one in this database, so that we can select titles from the list. In this case, we’re going to add titles manually and set up some partial matching. We want anyone whose job title begins with “Chief,” so we’ll enter “Chief” followed immediately by the wildcard character, a percent sign, in the box. Then we click ‘OK’. We can click ‘Add’ again to include more titles, like CFO, CDO, CEO, and so on.
Next we click ‘Add’ in the lower box to choose what list, or lists, people with these titles should be placed on. For this example, we’ll make a fresh list by clicking ‘Add Rollup’, filling in a description, and saving. Now we can select the list we just made.
The same process can be repeated for as many combinations of titles and lists as you please. Now let’s see it in action! We’ll use the record adding wizard to parse the contact data from a resume we’ve received. The title on this one is Chief Operating Officer.
After saving the record, if we look at the Rollup area, we’ll find that she has been automatically linked to the specified list based on her title. The same action would occur if she had self-registered on our job board with that title. And if we go to a record that’s already in the system and update the title to one that matches the rule we created, that’ll get placed on the list as well.
For more Two Minute Tuesdays, subscribe to this YouTube channel, follow us on Facebook, LinkedIn, or Twitter, join the PCRecruiter LinkedIn users group, and watch our blog posts on your PCR login screen. If you have any topics or suggestions for future Two Minute Tuesdays, send an email to twominutetuesday@mainsequence.net.

PCRM — the CRM and Recruitment ATS hybrid built specifically to empower and scale with solo recruiters and growing agencies — is now available.
Read more
Recruitment professionals are facing a new challenge in today’s digital landscape: scammers posing as legitimate recruiters. These scammers are increasingly targeting remote work job seekers, causing some candidates to become wary of all recruitment outreach.
Read more
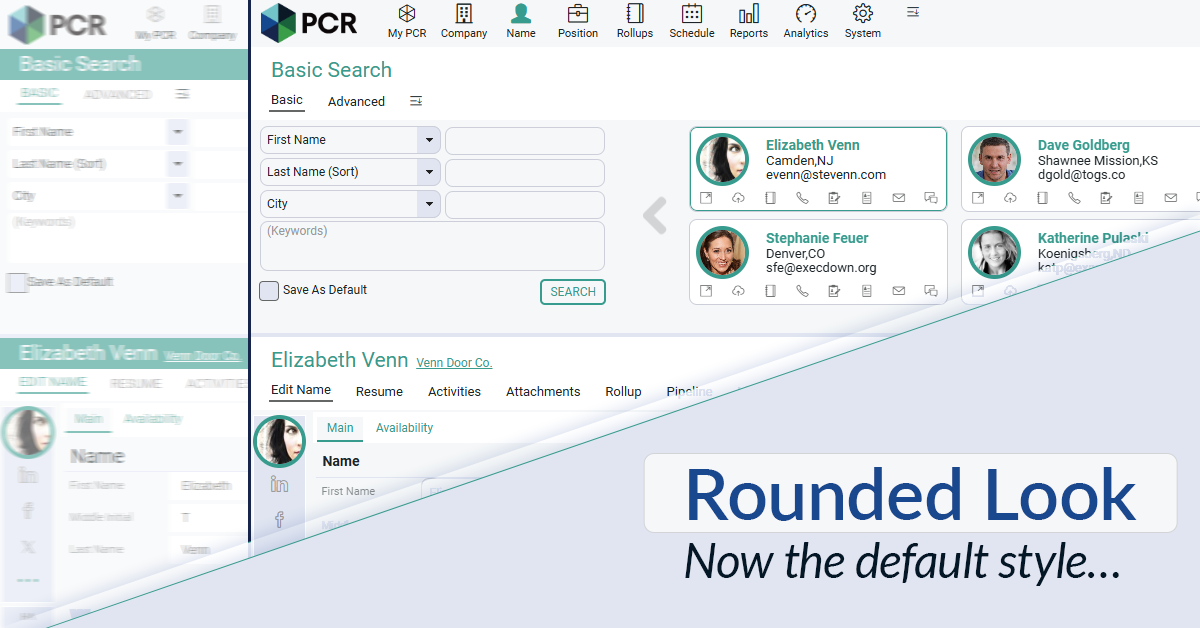
The Rounded Look for inputs and navigation elements has been made the default style throughout PCR. This rounded style can be combined with any of the seven color themes.
Read moreFind out more about who we and what we do.